Transform Photos with Watercolor Painting Action
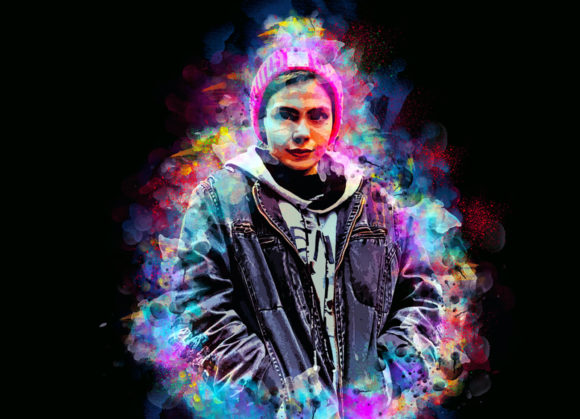
Digital art often struggles to capture the organic, unpredictable beauty of traditional media. We spend hours tweaking filters and adjusting opacity, yet the result frequently feels flat or overly processed. This is where a specialized Watercolor Painting Photoshop Action changes the game. It is not merely a filter; it is a sophisticated workflow tool designed to bridge the gap between digital precision and hand-painted charm. By automating complex layering techniques, this action allows designers, photographers, and hobbyists to achieve a genuine watercolor aesthetic in seconds, preserving the integrity of the original image while adding artistic depth.
The Artistic Appeal of Digital Watercolors
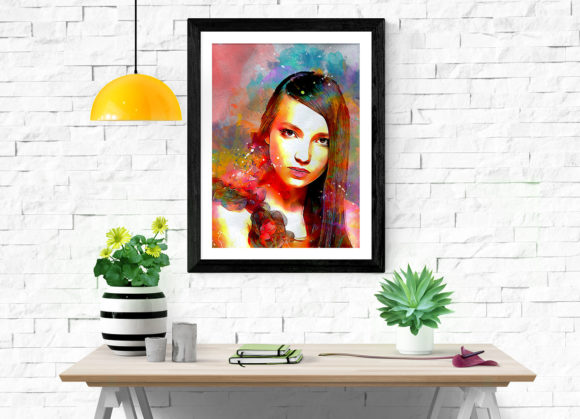
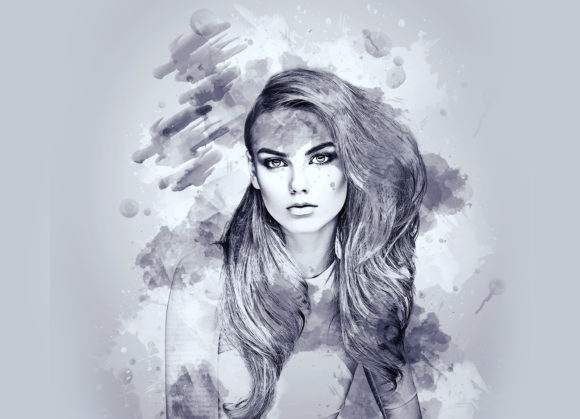
The visual characteristics of a true watercolor painting are defined by fluidity, transparency, and texture. Unlike oil or acrylics, watercolors rely on the white of the paper for highlights and build depth through layered washes. A high-quality Watercolor Painting Photoshop Action replicates these nuances by simulating how pigments bleed into paper fibers. The result is an image that feels breathable and light, avoiding the heavy, plastic look common in basic digital effects.
This style carries a distinct personality: soft, nostalgic, and approachable. It appeals to audiences because it feels human-made. In a world saturated with hyper-realistic 4K imagery, the slight imperfections of a watercolor effect—such as uneven edges and subtle color variations—create an emotional connection. For brand strategists and content creators, this translates to higher engagement. Whether used for social media graphics or editorial illustrations, the watercolor look suggests creativity, elegance, and a personal touch that sterile digital assets often lack.
Versatility Across Creative Industries
While many assume watercolor effects are limited to greeting cards or children’s books, their application in professional design is vast. The versatility of this action makes it a valuable asset for various sectors, from branding to digital marketing.
- Brand Identity and Logo Design: For businesses aiming for a boutique, artisanal, or eco-friendly image, watercolor textures add warmth. Think of organic skincare labels, wedding planning services, or local bakeries. The soft edges soften the corporate feel, making the brand appear more accessible and trustworthy.
- Packaging Design: In retail, shelf appeal is critical. A watercolor background on product packaging can differentiate a item from competitors using rigid, geometric designs. It works exceptionally well for tea blends, craft beers, and luxury stationery.
- Editorial and Publishing: Magazines and blogs often use watercolor elements to break up text-heavy layouts. These visuals serve as gentle anchors for the eye, providing rest points without demanding the intense focus required by high-contrast photography.
- Web Design and UI: While not suitable for primary navigation elements due to readability concerns, watercolor textures excel in hero sections, about pages, and blog headers. They add depth to flat design interfaces without cluttering the user experience.
The key to successful implementation lies in understanding the balance between art and function. In web design, for instance, the watercolor effect should enhance the content, not distract from it. Using the action on background elements or accent images ensures that the core message remains clear while the overall aesthetic remains cohesive.
Technical Workflow and Customization
One of the strongest advantages of this specific Watercolor Painting Photoshop Action is its non-destructive nature. Professional designers know that flexibility is crucial during the revision process. This action preserves your original photo, allowing you to tweak settings long after the effect has been applied. It is compatible with a wide range of Adobe Photoshop versions, including CS4 through CC2020, ensuring that users with older hardware or newer setups can both benefit from the tool.
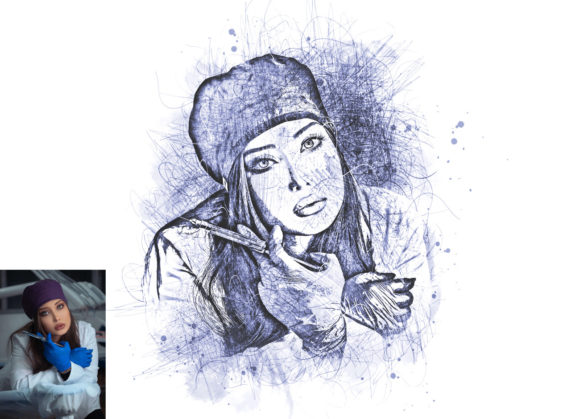
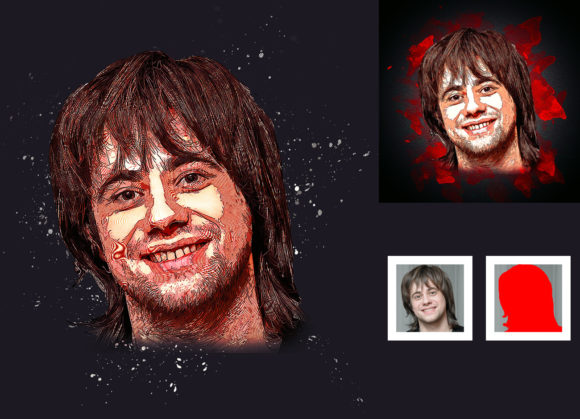
The workflow is straightforward but requires attention to detail for optimal results. To begin, you must open your chosen photo and create a new layer. Crucially, this layer must be named “brush” in lowercase letters. This naming convention triggers the action’s internal logic. Using a soft brush, you paint over the areas of the image you wish to transform. This step gives you complete control over which parts of the photo retain their original clarity and which parts dissolve into artistic washes. Once satisfied, you hide the “brush” layer, select the background, and play the action.
Customization is where the tool shines. Upon opening the generated layers, you will find ten different color options available in the unviewed eye folders. This feature allows you to shift the mood of the piece instantly—from cool, melancholic blues to warm, vibrant oranges—without restarting the process. You can also easily change brush colors to match specific brand identity guidelines. For the best quality, it is recommended to use images with a resolution of at least 2000x3000 pixels. Higher resolutions ensure that the texture details remain crisp and do not pixelate when scaled for print or large-format displays.
Achieving Professional Results
To maximize the potential of this action, consider the source material. Images with strong contrast and clear subjects work best, as the watercolor effect tends to soften details. Portraits, landscapes, and still-life compositions are ideal candidates. Avoid images that are already heavily filtered or low-resolution, as the action cannot restore lost data.
When integrating these assets into broader projects, think about font pairing and layout. Since watercolor textures are organic and free-flowing, they pair beautifully with clean sans serif font choices for modern contrast, or elegant script font options for a cohesive, romantic feel. Avoid using overly decorative display font styles that might compete with the texture for attention. The goal is harmony between the visual elements.
Furthermore, always review the included help files and PDF read-me instructions. These resources provide insights into troubleshooting common issues and optimizing the action for specific lighting conditions. The package includes not just the ATN file, but also custom brushes and patterns that expand the creative possibilities beyond the default settings. By leveraging these additional design assets, you can create unique variations that stand out in a crowded digital landscape.
Ultimately, this tool is about efficiency without sacrificing quality. It empowers creators to produce high-end, artistic visuals without needing years of traditional painting training. Whether you are a marketer looking to refresh campaign visuals, a blogger aiming for a softer aesthetic, or a small business owner creating DIY packaging, this action provides a reliable, professional solution. It transforms ordinary photos into compelling art, enhancing audience engagement and elevating the perceived value of your creative work.