Mastering the Abstract Watercolor Portrait Photoshop Action for Stunning Digital Art
Digital artistry has evolved rapidly, allowing creators to blend traditional aesthetics with modern technology. One of the most captivating trends in this space is the use of automated tools to replicate hand-painted styles. Specifically, the Abstract Watercolor Portrait Photoshop Action has become a vital resource for designers, photographers, and hobbyists looking to elevate their visual content. This tool transforms standard photographs into extraordinary, painterly images with minimal effort. However, achieving professional-grade results requires more than just clicking a play button. Understanding the nuances of installation, preparation, and customization is essential to avoid common pitfalls that can lead to disappointing outcomes.
Understanding the Tool and Its Potential
An Abstract Watercolor Portrait Photoshop Action is essentially a recorded sequence of commands within Adobe Photoshop. When applied correctly, it simulates the fluid, organic look of watercolor paint on paper. The primary appeal lies in its efficiency. What might take hours to paint manually can be achieved in minutes, offering a non-destructive workflow that preserves the original image data. This makes it an ideal solution for marketers needing quick social media assets, bloggers enhancing article headers, or artists experimenting with new styles.
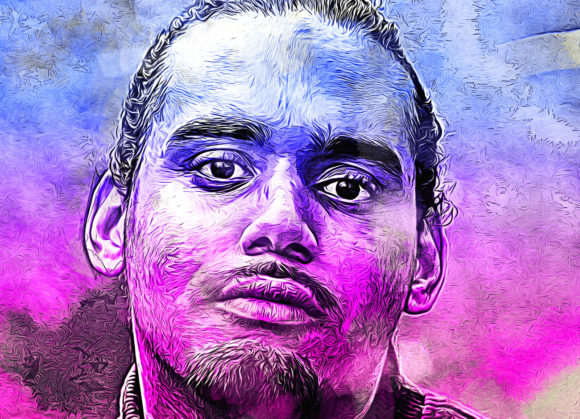
The specific action discussed here offers ten different color options, providing versatility without requiring advanced color theory knowledge. It is designed to be easy to customize, ensuring that users can tweak the output to match their brand identity or artistic vision. Supported across a wide range of Photoshop versions—from CS5.5 up to CC2020 English Version—it remains accessible to both legacy users and those on the latest software updates.
Common Mistakes That Compromise Quality
While these actions are marketed as "easy to use," many users encounter issues because they overlook critical preparatory steps. The most frequent error is ignoring resolution and canvas requirements. Watercolor effects rely heavily on texture and detail. If you apply the action to a low-resolution web image, the result will appear pixelated and muddy rather than soft and artistic.
Another common misunderstanding involves layer management. Users often forget to rename layers correctly or fail to isolate the subject properly. The action relies on specific layer names, such as "paint," to identify where to apply the brush strokes. Neglecting this simple instruction causes the script to fail or produce erratic results. Additionally, some users expect the action to work perfectly on every photo without any pre-editing. In reality, high-contrast lighting and clear subject separation yield the best abstract effects.
The Impact of Poor Preparation
When these mistakes occur, the consequences are immediate. Poor resolution leads to unusable files that cannot be printed or displayed professionally. Incorrect layer setup wastes time troubleshooting rather than creating. Furthermore, applying the effect to cluttered backgrounds dilutes the focus, resulting in a chaotic image rather than a striking portrait. These issues not only affect the final aesthetic but also reduce workflow efficiency, causing frustration and potentially leading users to abandon the tool prematurely.
Best Practices for Optimal Results
To ensure you get the high-quality results promised by the Abstract Watercolor Portrait Photoshop Action, follow these proven steps. Preparation is half the battle. Before running the action, you must prepare your canvas and image correctly.
- Extract and Resize: Start by isolating your subject. Use the crop tool to extend the canvas on two sides or all sides, creating negative space that mimics traditional paper borders. Resize your image to at least 3000x3000 pixels with a DPI of 72. This ensures sufficient detail for the watercolor textures to render clearly.
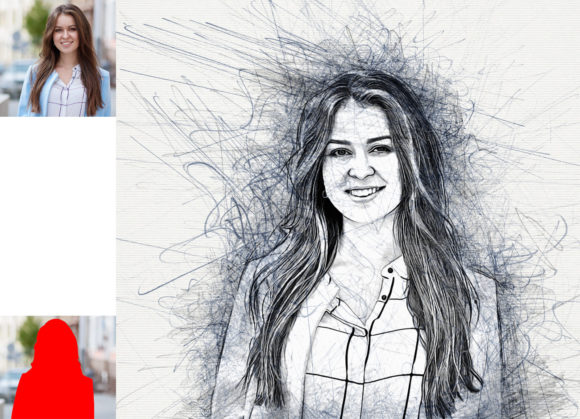
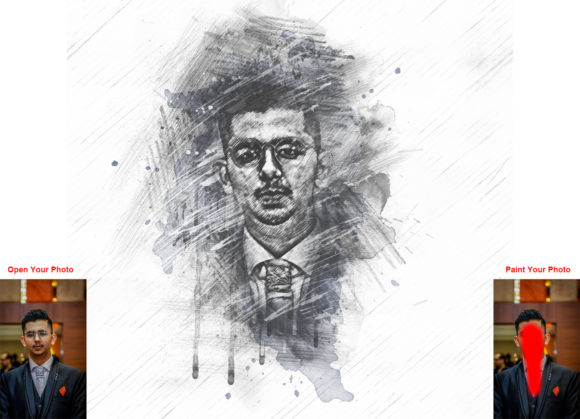
- Layer Naming: Open your photo and create a new layer. Rename this layer exactly as “paint” in lowercase letters. This step is crucial because the action script looks for this specific name to apply the brush strokes.
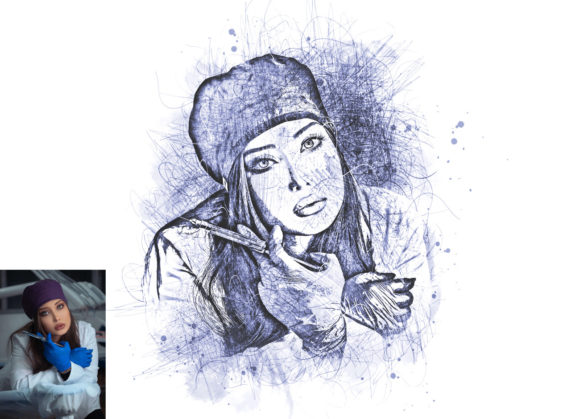
- Manual Painting: Select a brush and roughly paint over the areas of the image you want to transform. You do not need to be precise; broad strokes work best. Once done, hide the visibility of the “paint” layer but keep it selected.
- Execute the Action: With the “paint” layer selected, click the play button on the action panel. The script will process the image, applying the watercolor effects based on your underlying painting.
Following this structured approach guarantees that the non-destructive effect applies evenly. You can then explore the ten different color options provided in the pack. Changing colors is straightforward, allowing you to experiment with warm, cool, or monochromatic palettes to suit your project’s mood.
Evaluating Compatibility and Usability
Before downloading or purchasing any Photoshop action, verify software compatibility. This particular pack has been tested on Photoshop English versions from CS5.5 through CC2020. If you are using a non-English version, you may encounter errors due to language-specific menu differences. Always ensure your software is updated to a supported version to avoid technical glitches.
Additionally, check what is included in the file package. A comprehensive pack should include the ATN file (the action itself), custom brushes, a help file, and a PDF user guide. The presence of organized layers and easy installation instructions significantly reduces the learning curve. For beginners, having access to a detailed user guide is invaluable for troubleshooting and understanding advanced customization options.
Customization and Creative Control
One of the strongest features of this action is its customizability. While the default settings provide a solid starting point, true artistic control comes from tweaking the results. After running the action, explore the generated layer groups. You will find separate layers for textures, colors, and adjustments. Adjusting the opacity of these layers allows you to fine-tune the intensity of the watercolor effect.
For instance, if the colors appear too saturated, lower the opacity of the color adjustment layers. If the texture feels too heavy, reduce the visibility of the brush stroke layers. This level of control ensures that each portrait remains unique and tailored to your specific needs. It transforms the action from a simple filter into a flexible design tool.
Making the Right Choice for Your Workflow
When deciding whether to integrate an Abstract Watercolor Portrait Photoshop Action into your workflow, consider your volume of work and desired aesthetic. If you frequently need stylized portraits for social media, editorial content, or client projects, this tool offers significant time savings. However, it is not a replacement for fundamental design skills. Understanding composition, lighting, and color harmony will help you choose the right photos to transform.
Avoid the trap of relying solely on automation. Use the action as a base, then add manual touches to enhance details or correct imperfections. This hybrid approach combines the speed of digital tools with the nuance of human creativity, resulting in truly professional-grade imagery.
In conclusion, the Abstract Watercolor Portrait Photoshop Action is a powerful asset for modern creators. By respecting the technical requirements—such as proper resizing, layer naming, and software compatibility—you can avoid common errors and unlock the full potential of the tool. Whether you are a seasoned professional or a curious beginner, mastering this action can expand your creative repertoire and streamline your production process. Always prioritize preparation and customization to ensure your final images stand out with clarity, style, and artistic integrity.